Hello again fellow bloggers,
I've been a busy bee on the computer today. Wanted to invite you to a really fun blog hop. It's called the 15 Days of Christmas Blog hop. Hosted by Jess at KinderStampO. It was so much fun to see everyone's projects. There's also fabulous GIVEAWAYS. So as I went through the 15 blogs I made some yummy cupcakes. I'm by no means a baker but every so often I get inspired and make something. They're from a Duncan Hines cake mix and I added a banana to them which gave them that extra little kick. Feeling very Christmasy I then sprinkled them with green sugar sprinkles. So in honor of celebrating Christmas in July here are my cupcakes. Thanks for the blog hop! I swear there was enough for the 15 blogs but the little hands in my house (hubby and I included) couldn't resist.
Saturday, July 24, 2010
Primping your Punches
Punches are one of the most durable tools if you take care of them. Here are a few tips to keeping them punching like new.
-Store them in a dry place. (you wouldn't want them to rust)
-If your punch is STICKY lubricate it with WAX PAPER. Regularly punch through a couple of layers of wax paper. More detailed punches stick more often. I've heard using a little WD-40 works too. (I wouldn't try this because I'd probably use way more than I have to.) If you do use WD-40 make sure to punch through scrap paper a few times to clean it off.
-If your punch is DULL punch through a couple of layers of aluminum foil. This does not need to be done as often. This will get them to punch like new!! You can also save the punches you made on the foil and use them on a future project.(thinking frugal here) You can also sharpen your shears.
-If your punch won't compress STAND UP and put a little weight on it. Use the palm of your hand. If that doesn't work trying using a thinner material.
-If your punch gets stuck and you can't get the paper out DO NOT USE YOUR FINGERS TO PRY IT FREE!! IT IS SHARP!! Try compressing it once more (sometimes this will release it) or use a blunt object (screwdriver, fork/spoon handle to help release the paper.
HOPE THIS HELPS AND HAPPY PUNCHING!!!
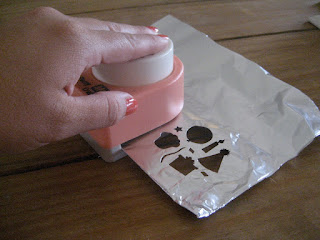
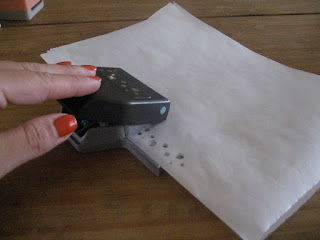


It's all in the layering
Hope you're all having a fabulous Saturday! Here's a page I made a few nights ago. I used My Minds Eye paper stack. I took a few patterned papers, layered them and voila!! I also distressed all my edges and inked them with "Vintage Photo" distress ink. I added some embellishments and used the Cricut to cut out the "Happily" (Gypsy Fonts cartridge) Here are some tips I found on scrapbook.com on paper layering...see photos after tips.
Mix different size patters together - such as a one large pattern with a few smaller patterns.
*** Use consistent patterns with different colors - such as all stripes, all circles, etc.
*** Use patterns with similarities other than color - such as all geometric shapes - with one pattern being stripes, one being squares, one being circles, etc - or all plant themes - with a small floral print, a large floral print, a leafy print, etc
*** Use a solid piece of card stock to pull together several patterns using the same color.
*** Use patterns with subtle similarities - such as a striped pattern with thin black accent lines, a leaf pattern with black lines accenting the leaves, and a square pattern with thin black line accents.
*** Use patterns with the main colors within the same color family.
*** Put all your patterns on your desk beside each other - take three steps back and squint. If something sticks out like a sore thumb - remove that pattern and look again.
*** If you have a pattern you want to use, but it doesn't quite match, try changing it - for example if you have a few patterns with a yellow base color and one page that goes well except for the bright white in it, use your chalks to change the white to yellow!
*** When using bright patterns, if you like them together, but something just isn't quite right - try "inking" the edges white. It will soften the colors and give it a more unified look.
| Materials |
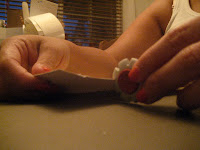 |
| Distressing paper (I did this to all of them) |
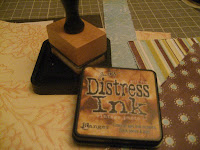 |
| inked all the edges |
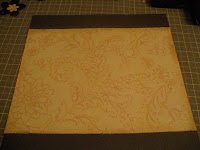 |
| Start layering |
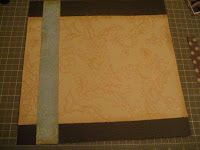 |
| more layering... |
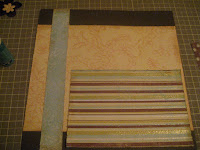 |
| and more layering... |
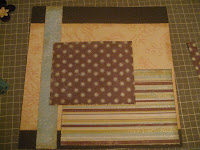 |
| one last layer..this is actually the mat to my photo. |
| Add some embellishments and here you have it. |
Friday, July 23, 2010
Pockets, pockets and more pockets
Happy Friday! Hope you all have a wonderful weekend. I've discovered something new. (not new just never done it before) Recently I was working on a scrapbook album and found myself with a bunch of receipts, tickets, brochures, room keys...etc I decided to try implementing a pocket here or there and here's what I came up. I couldn't help myself. Every opportunity I had I added a pocket. They're great! It really helps with spacing on your layouts.
ENJOY!
Subscribe to:
Comments (Atom)


